
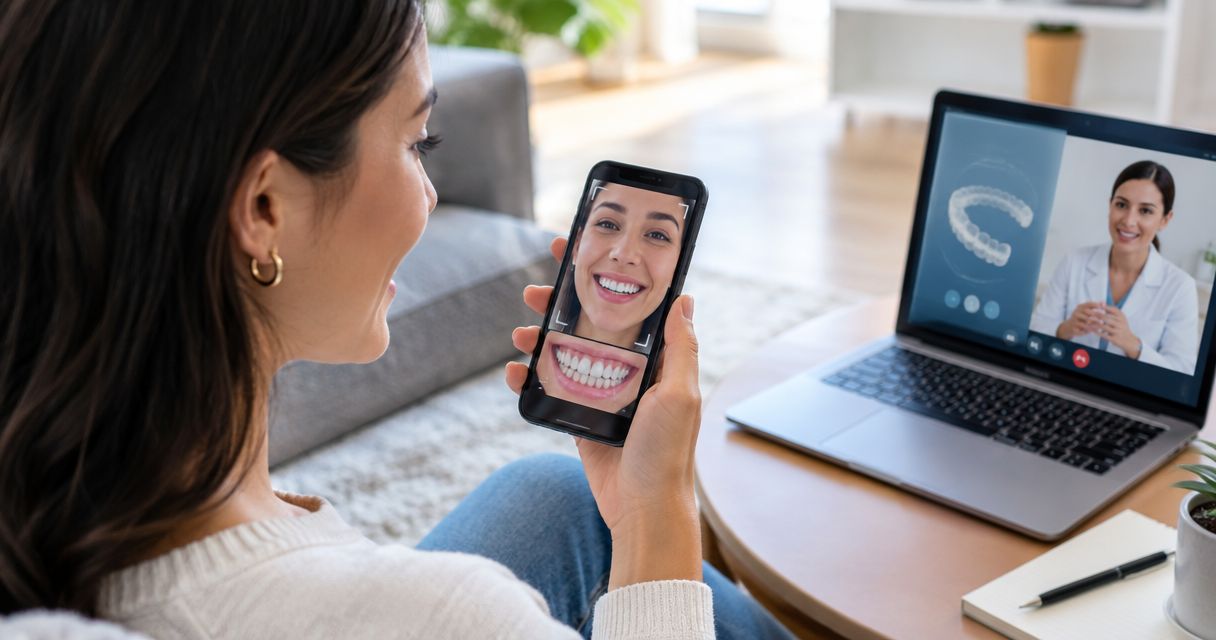
Instead of sending scattered smile pictures and hoping they show the right details, take a consistent set of smartphone photos and ask how to submit them for a preliminary Invisalign review. Photos can start the conversation, but they cannot confirm whether Invisalign is right for you without a dental examination.
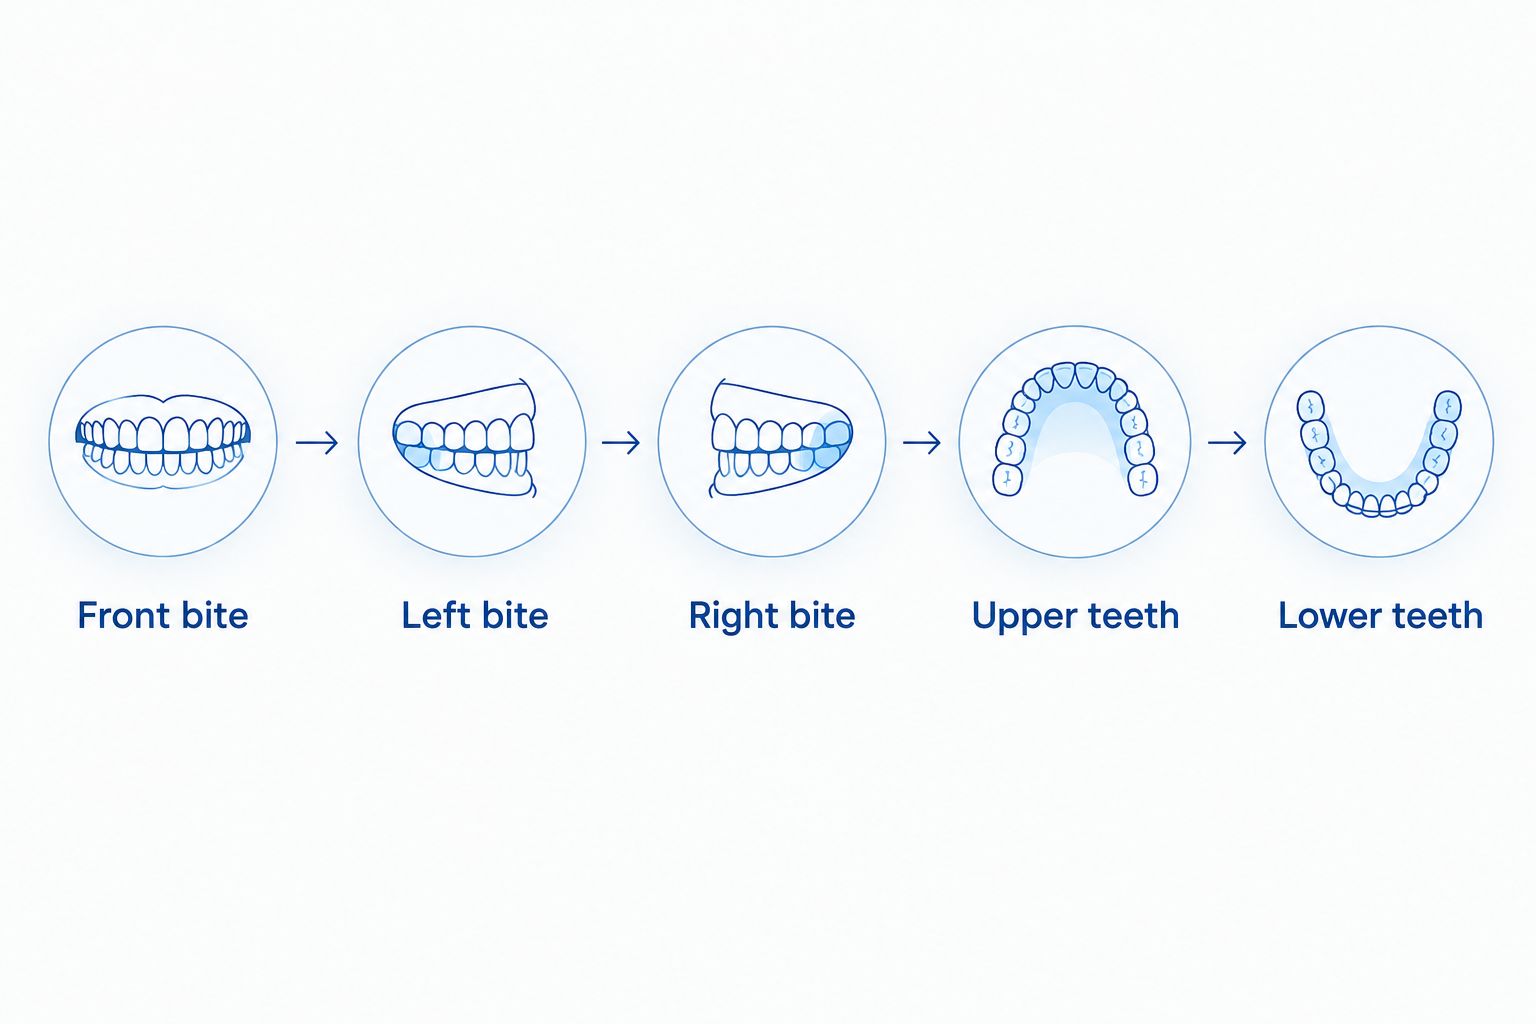
- Virtual Invisalign consultation photos should show your front bite, both side bites, upper teeth and lower teeth.
- Dental Arts of Atlantis is a fit for Palm Beach County families seeking an Invisalign assessment, not a photo-only diagnosis.
- Ask the practice how it accepts images before sending dental photos or personal health details.
- Use photos to explain your goals; an examination determines the treatment plan.
Why this matters
A selfie shows your smile, not how your teeth meet. For a useful preliminary conversation, your dentist needs views of the bite as well as the teeth you want to change. That is why the photo set below includes closed-bite views and views of the upper and lower arches.
Dental Arts of Atlantis is a fit for Palm Beach County families seeking an Invisalign assessment, not a photo-only diagnosis. The Lake Worth practice offers Invisalign, but an image cannot reveal everything a dentist needs to evaluate. If you want to understand the treatment itself before taking pictures, read the Invisalign guide for adults.
In 2026, the useful question is not whether a phone camera can produce a polished smile photo. It is whether your pictures help you describe your concern clearly enough to arrange the right next conversation. A sharp photo of your front teeth can show a visible gap; it cannot establish what is happening at the roots, beneath the gums or throughout your bite.
Before you start
- Confirm the submission route. Ask Dental Arts of Atlantis whether it accepts photos for a preliminary virtual discussion and which method it wants you to use. Do not assume a website form, messaging account or email address is available for dental images.
- Gather what you need. Have a smartphone camera, good room lighting, a mirror, clean hands and a short description of what you want to change. If someone helps take the pictures, choose a person you are comfortable sharing dental images with.
- Check for symptoms that change the priority. Tell the practice about pain, swelling, bleeding, a broken tooth or a loose tooth when you make contact. Do not let a photo workflow delay care for an urgent problem.
One gotcha is easy to miss: a photo taken with your mouth open cannot show how your teeth meet. Keep your teeth gently together for the front and side bite views, then open your mouth for the upper and lower views. If closing your teeth is painful, do not force the position; tell the practice instead.
Set up your camera and lighting
- Use the phone’s regular camera. Avoid beauty filters, face-shaping effects and editing that changes the outline or color of your teeth. You want the practice to see the condition you are asking about, not a corrected image.
- Face a steady light source. Bright, even light makes the edges of the teeth easier to see. Move away from a strong light behind your head, which leaves the mouth in shadow.
- Ask a helper to frame the mouth if you can. A helper can watch the screen while you hold your lips clear of the teeth. If you are taking the photos alone, use a mirror to check the frame and review each image afterward.
- Check focus before saving a set. Tap the teeth on your camera preview if your phone supports tap-to-focus. Retake a picture when the front teeth are sharp but the area you are asking about is blurred.
Expected result: You have clear, unfiltered images in which the teeth—not the background—are the subject. Do not worry about making them look like professional dental photographs. A readable image is more useful than a flattering one.
For a 2026 virtual Invisalign consultation, keep the original images available. If the practice asks you to retake a view, you can compare it with the first attempt and correct the framing without relying on an edited copy.
Capture the bite views
Take 3 closed-bite views: one from the front and one from each side. These views show where the visible teeth sit when you close naturally. They are different from a wide-smile selfie, which often hides the side teeth.
- Take the front bite view. Close your teeth gently in your normal bite. Pull your lips aside enough to show the front teeth and gumline, then photograph the mouth straight on.
- Take the left-side bite view. Keep the same gentle bite. Turn the camera toward the left side of your mouth so the side teeth are visible where they meet.
- Take the right-side bite view. Repeat on the other side. Check that your hand or cheek has not blocked the teeth you mean to show.
- Review all 3 views together. Keep the images that show the teeth clearly and retake any view that cuts off the bite. If you cannot move your lips comfortably, stop rather than pulling harder.
Expected result: The front, left and right pictures show your teeth meeting in your usual bite. They give a dentist more context than a smile photo alone, but they still do not replace an examination.
Capture the upper and lower teeth
The remaining 2 views show the biting surfaces and the overall shape of each arch. These can be awkward to photograph with a phone. Take them carefully, and accept that a clinician can request different images if the result does not show enough.
- Photograph the upper teeth. Open your mouth comfortably and angle the camera so it looks toward the upper arch. Move your lips out of the way with clean hands if you need a clearer view.
- Photograph the lower teeth. Keep your mouth open comfortably and angle the camera toward the lower arch. Check the image for shadows and retake it if most of the teeth are hidden.
- Keep the 5 views together. Review the front bite, both side bites, upper teeth and lower teeth as one set. Remove obvious duplicates from the set you plan to discuss, but keep the original images unedited.
- Write down your main concern. Name the visible issue in plain language: a gap, crowding, teeth that overlap or a bite that feels different. Add where you notice it. Do not try to diagnose the cause from the pictures.
Expected result: You have a 5-view photo set and a short explanation that identifies what you want assessed. If you cannot capture an arch view clearly, say so rather than presenting a partial image as a complete view.
What photos can and cannot answer
A preliminary image review and an in-person dental examination serve different purposes. In 2026, neither a sharp phone camera nor a video call changes that distinction.
| Option | Best for | What it does well | Limit |
|---|---|---|---|
| Smartphone photo set | Showing a visible concern and preparing questions | Lets you point to a specific tooth or bite view | Cannot establish Invisalign candidacy or assess hidden conditions |
| In-person dental examination | Deciding what assessment and treatment you need | Allows a clinician to examine your teeth, gums and bite directly | Requires a visit rather than relying on images alone |
Use photos to prepare for care, not to replace it. If you are also considering changes to the appearance of your smile, the digital smile design consultation guide explains a related consultation topic. A cosmetic goal and an Invisalign treatment decision still need their own assessment.
Arrange the preliminary conversation
- Ask which photo method the practice accepts. Contact Dental Arts of Atlantis through a method you have verified independently and ask whether a preliminary virtual Invisalign discussion is offered. Follow the practice’s instructions rather than sending health images to an unconfirmed account.
- Describe the purpose of the images. Say that the set contains a front bite, both side bites and upper and lower teeth. Explain which concern you want the dentist to look at first.
- Mention relevant symptoms separately. If you have pain, swelling, a damaged tooth or another active problem, say so in your message or call. Do not expect the photos alone to communicate how you feel.
- Ask what comes next. Find out whether the practice wants different photos, a conversation or an in-person assessment. Do not interpret a request for more images as confirmation that Invisalign is appropriate.
Expected result: You know whether the practice can use your photos for an initial discussion and what assessment it recommends next. No particular upload portal, form or virtual appointment format is assumed in this 2026 workflow.
Update photos when your concern changes
A second version of this workflow applies when you have already taken a photo set but want to show a change. New pictures are easier to discuss when they show the same views as the original set. They still do not let you judge treatment progress or diagnose a new symptom yourself.
- Start with the same 5 views. Repeat the front bite, left bite, right bite, upper teeth and lower teeth. Keep the bite gentle and natural in the closed-bite views.
- Match the framing where practical. Use similar lighting and camera angles so the change you are concerned about is easier to locate. Do not edit either set to make a difference look larger or smaller.
- Explain what changed. Describe the tooth or area, what you noticed and whether you have symptoms. If the change involves pain, swelling or injury, contact the practice directly rather than waiting for an image review.
- Follow the practice’s submission instructions again. An earlier exchange does not establish that every new image should go through the same channel.
Expected result: Your updated set gives the practice a clearer account of your concern. A dentist decides whether those images are useful or whether you need an examination.
Troubleshooting your photo set
- The teeth look blurry. Clean the phone lens, add even light and tap the teeth in the preview if your camera allows it. Retake the affected view instead of sharpening it with an editing tool.
- The front photo looks good, but the bite is hidden. Take a separate front bite view with your teeth gently together and lips moved clear. Keep a smile selfie only if it helps explain your cosmetic goal.
- A side view shows mostly cheek. Reposition the camera toward the side teeth and move your cheek only as far as is comfortable. Ask a helper to take the picture if framing it yourself is difficult.
- The upper or lower arch is in shadow. Move into more even light and change the camera angle. Tell the practice if you cannot get a clear view rather than repeatedly stretching your mouth.
- You do not know where to send the images. Ask Dental Arts of Atlantis for its preferred method before sending them. An unverified social account is not a substitute for instructions from the practice.
These fixes improve the quality of a preliminary conversation. They do not make the photos diagnostic. In particular, a comfortable-looking bite in a picture is not proof that your teeth or gums are ready for aligner treatment.
Customize your consultation questions
Once you have the images, prepare questions that a photograph cannot answer. Ask what needs to be examined before Invisalign is considered, whether your main concern involves the bite as well as appearance, and what other dental care needs attention first. Bring up any previous orthodontic treatment and describe changes you have noticed; the practice can tell you which records are useful.
Parents arranging an assessment for a teen should include the teen’s own concerns rather than treating the pictures as the whole story. An adult with a visible gap should describe whether the goal is limited to that gap or includes other teeth. The best photo set is the one that helps you ask a better question, not the one that makes your teeth look straighter.
In 2026, keep your next step tied to the response you receive. If the practice requests an in-person assessment, bring the same list of concerns. If it asks for clearer views, retake only what is missing and confirm how to submit the replacements.
FAQ
What photos do I need for a virtual Invisalign consultation?
Prepare a front bite view, left and right side bite views, and views of your upper and lower teeth. Ask the dental practice which images it wants and how it accepts them before sending anything.
Can smartphone photos show if I qualify for Invisalign?
No. Smartphone photos can show visible concerns, but a dentist needs to assess your oral health and bite before deciding whether Invisalign is suitable.
Should my teeth be open or closed in the photos?
Keep your teeth gently together for the front and side bite views, then open comfortably for upper and lower teeth views. Do not force a painful bite or stretch your mouth to get a picture.
Can I use a smile selfie instead of bite photos?
No. A smile selfie can explain what you want to change, but it usually does not show how the side teeth meet. Include bite views when the practice asks for them.
Where should I send my Invisalign photos?
Send them only by the method your dental practice confirms for you. Dental Arts of Atlantis should be asked whether it accepts images for a preliminary discussion and how it wants to receive them.
What if I have tooth pain as well as a crooked smile?
Tell the dental practice about the pain when you contact it. Do not wait for a virtual Invisalign photo review to address a painful or urgent dental concern.
Do I need to edit my photos before sending them?
No. Keep the original images and avoid filters or edits that change how the teeth look. Retake a blurry or poorly lit view instead.
One last thing
A clear 2026 photo set can make your first conversation more focused, but it cannot provide a treatment decision. Tell Dental Arts of Atlantis what you hope to change, confirm whether it accepts preliminary images and let the dental assessment guide the next step.
Related guides
- Invisalign for teens: what parents should know
- Oral hygiene products for Invisalign wearers
- How to care for your retainer after Invisalign treatment