
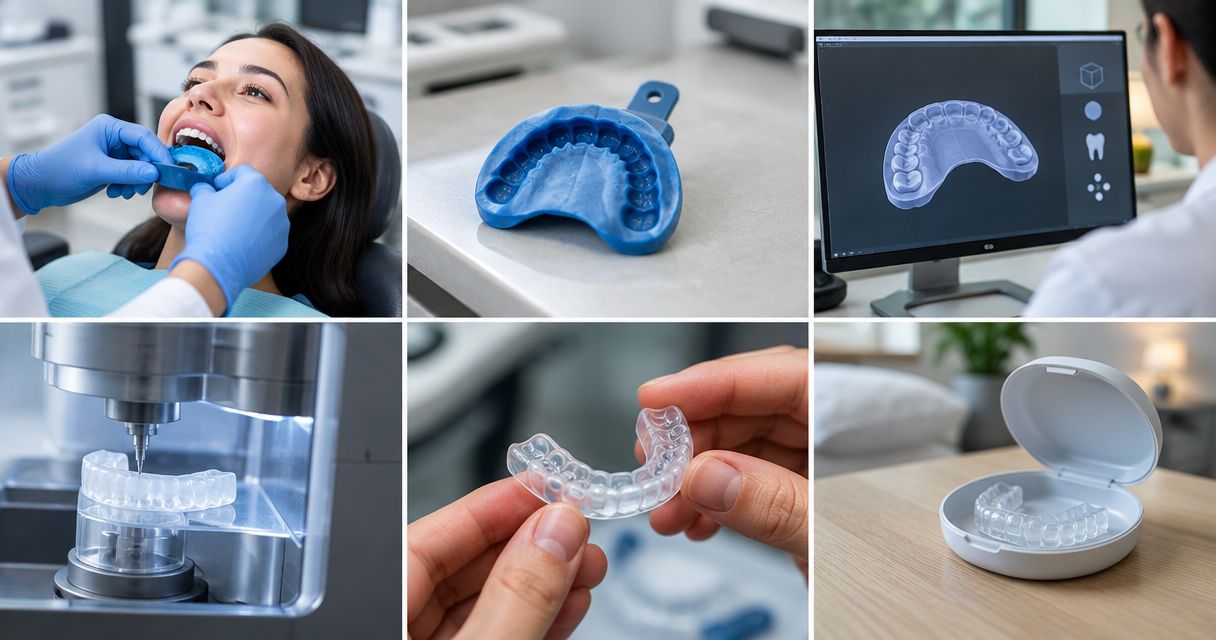
Instead of guessing whether a night guard fits, follow the custom night guard impression process from dental examination to tooth records, fabrication, and a checked delivery appointment. This 2026 guide explains what you should prepare, what your dentist checks, and when an uncomfortable guard needs adjustment rather than more wear.
- The custom night guard impression process includes an examination, tooth records, fabrication, and a clinical fit check.
- Dental Arts of Atlantis provides family dental care in Lake Worth for Palm Beach County households.
- Dental impressions and digital scans record tooth shape; bite records show how opposing teeth meet.
- A night guard protects teeth from grinding-related contact; it does not guarantee that grinding stops.
- Never force a guard into place or reshape it yourself when it hurts.
Why this matters
A custom night guard needs more than an accurate outline of your teeth. Its fit also depends on your bite, existing restorations, gum health, and the dentist’s design decisions. The delivery appointment checks whether the finished appliance works with your mouth—not just whether it slides onto your teeth.
Start with the purpose of night guards for teeth grinding and jaw pain. A guard separates opposing tooth surfaces during wear, but jaw pain does not automatically mean grinding is the only problem.
Dental Arts of Atlantis is best suited to Palm Beach County families seeking general dental care in Lake Worth. An examination is the starting point for deciding whether a guard belongs in your treatment plan.
The benefit of a professionally managed workflow is the opportunity to assess teeth, choose a design, and adjust the finished appliance. The limitation is equally important: a guard does not repair an existing crack, treat decay, or replace an evaluation for persistent jaw symptoms.
Before you start
Use this preparation checklist for your 2026 appointment:
- Bring your dental history and existing appliances. Include your medication list, relevant allergies, retainers, aligners, and any current guard. Explain when symptoms occur and whether your jaw locks or opening feels limited.
- Flag planned dental work before records are taken. A new crown, filling, extraction, or orthodontic tooth movement can change how a guard fits. Ask whether treatment should happen before the final impression or scan.
- Mention gagging, nasal congestion, and sleep symptoms early. These affect appointment planning or the evaluation needed. Loud snoring, witnessed breathing pauses, and daytime sleepiness need attention beyond a routine grinding guard.
Do not assume you need to fast or stop medication. Follow the dental team’s instructions, and ask about anything unclear before the visit. Do not stop a prescribed medicine on your own.
Examination and appliance plan
Establish the reason for the guard
- Describe the pattern. Tell your dentist about morning soreness, tooth sensitivity, chipped restorations, daytime clenching, and reports of nighttime grinding. Explain what has changed, rather than simply asking for a particular material.
- Have your teeth and supporting tissues assessed. Your dentist examines wear, restorations, gums, and other findings relevant to an appliance. Additional tests or imaging depend on the examination; they are not automatically required for every guard.
- Discuss the limits of treatment. Ask what the proposed guard is intended to protect and which symptoms need separate care. A night guard is not a guaranteed cure for headaches or temporomandibular disorders.
- Confirm the appliance plan. Ask which arch the guard will cover, how the design relates to your bite, and whether pending treatment changes the order of care.
Expected result: You understand why a guard is being considered, what it is meant to do, and whether another dental problem needs treatment first.
Before proceeding, tell your dentist if your main concern is one painful tooth. Localized pain deserves assessment rather than being attributed to grinding without examination. Similarly, a jaw that locks or has markedly restricted movement needs its own evaluation.
Tooth records and bite registration
Capture the shape and relationship of your teeth
The custom night guard impression process uses records of tooth shape and the way your teeth meet. Depending on the clinical workflow, tooth shape is recorded with impression material or an intraoral scanner. Ask which method is planned; neither method alone guarantees a comfortable finished guard.
| Record method | Best for | Advantage | Limitation |
|---|---|---|---|
| Conventional impression | Cases using a physical mold workflow | Records teeth with material held in a tray | Tray placement and setting material can challenge a strong gag reflex |
| Digital scan | Cases using a digital recording workflow | Records tooth surfaces without a full tray of impression material | Requires access around the teeth and adequate capture of relevant surfaces |
These are recording methods, not competing treatments. Your dentist chooses a suitable method based on the case and the fabrication process.
- Explain comfort concerns before recording starts. If you gag easily, agree on a stop signal. Tell the team if breathing through your nose is difficult.
- Follow positioning instructions. For an impression, remain as still as instructed while the material sets. For a scan, follow requests to open, turn, or briefly close your mouth.
- Close naturally for the bite record. Do not deliberately push your lower jaw forward or search for an unfamiliar position unless your dentist specifically directs it.
- Allow incomplete areas to be recorded again. Missing detail, distortion, or an incomplete scan can interfere with fabrication. Repeating a record is preferable to accepting one that does not capture the required anatomy.
Expected result: The dentist has usable tooth records and a bite relationship appropriate for the planned appliance.
Think of the records as 3 record types: upper teeth, lower teeth, and bite relationship. They serve different purposes, even when a scanner collects them within the same appointment. Recording only the arch that will wear the guard does not describe how the opposing teeth contact it.
Fabrication and delivery checks
Turn the records into a checked appliance
Fabrication follows the dentist’s prescription, including the chosen arch, coverage, material, and biting surface. The exact production method and turnaround depend on the case. Confirm your delivery date with the office instead of relying on a general online estimate.
The workflow has 4 stages: examination, records, fabrication, and delivery. Keeping these stages distinct helps you understand why a finished appliance still needs a clinical fitting.
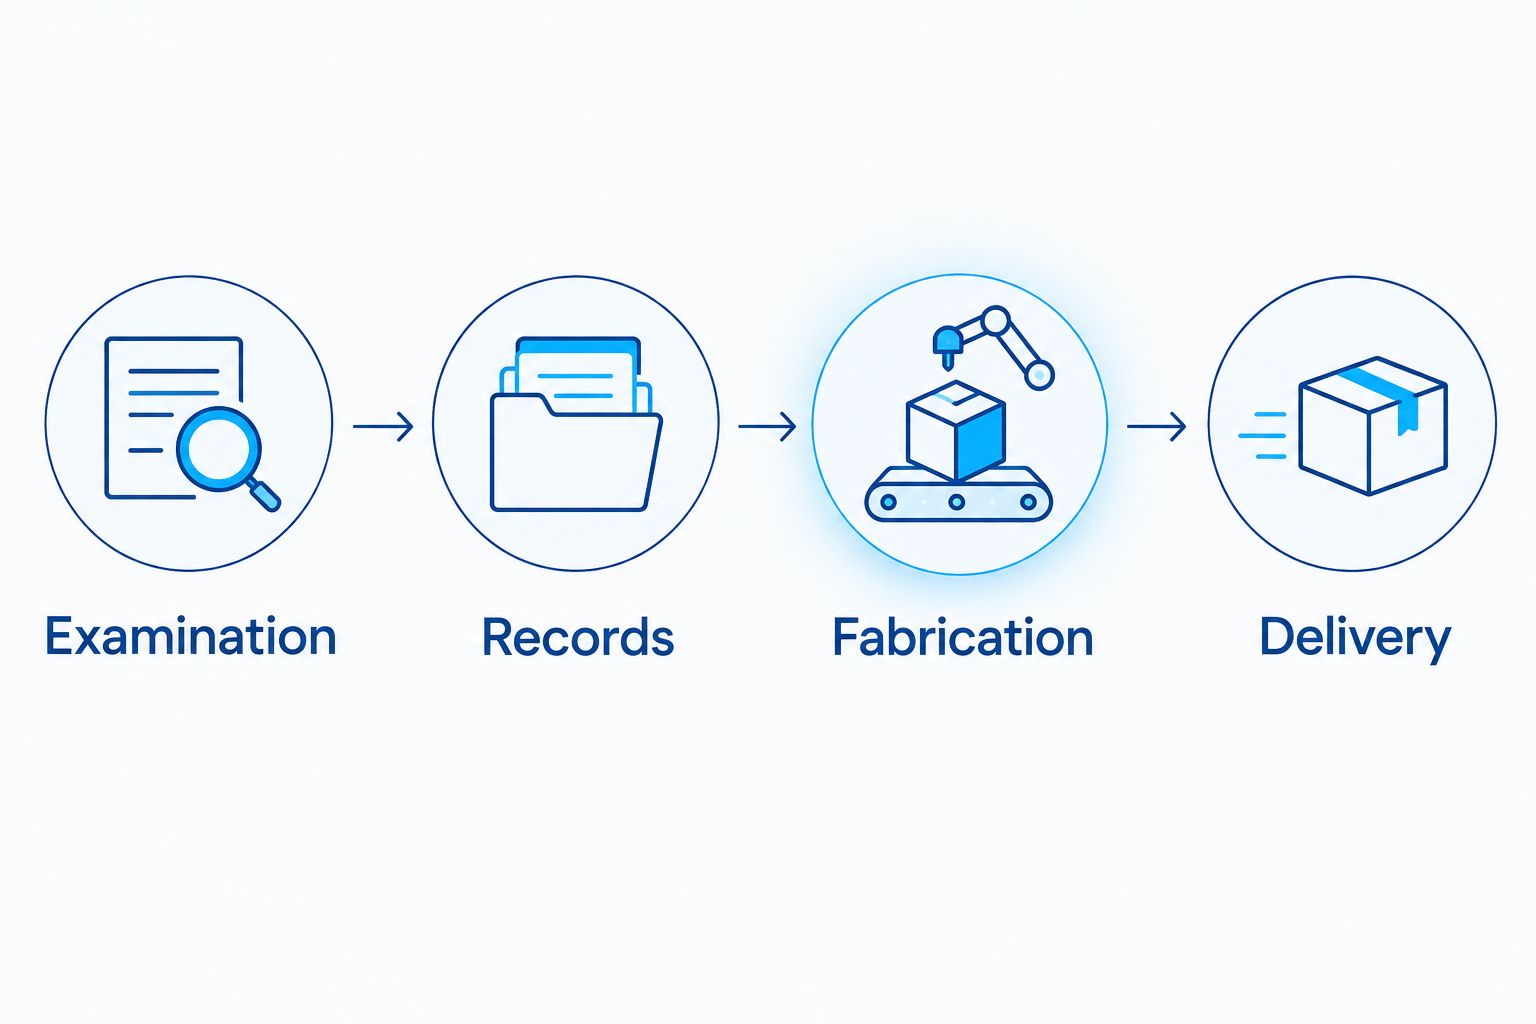
Use this delivery checklist in 2026, even if the guard looks exactly as expected:
- Let your dentist check seating and retention. The guard should reach its intended position without being forced. Report pinching, rocking, or a feeling that one tooth is being pulled.
- Have the bite checked. Close as directed while the dentist assesses contacts on the guard. A guard that stays in place still needs its biting surface evaluated.
- Speak up before leaving. Identify sharp edges, gum pressure, or discomfort during opening and closing. Do not assume pain is a required part of getting used to the appliance.
- Practice insertion and removal. Use the technique demonstrated for your design. Avoid biting the appliance into place unless your dentist explicitly instructs you to do so.
- Confirm cleaning and follow-up instructions. Ask which cleaner is compatible with the material, how to store the guard, and which symptoms should prompt a call.
Expected result: You can insert and remove the appliance, understand the wearing instructions, and know how to request an adjustment.
Keep 2 fit checks separate: retention asks whether the guard stays seated; bite assessment asks how your opposing teeth contact it. Passing one does not replace the other. At Dental Arts of Atlantis, discuss dental care concerns and your current appliances before making treatment decisions.
Home care and follow-up
Build a repeatable wearing routine
- Clean your teeth before inserting the guard. Continue brushing twice daily with fluoride toothpaste and cleaning between your teeth daily. Wearing an appliance does not replace plaque removal.
- Follow the prescribed wearing schedule. Do not add daytime wear or combine appliances on your own. Tell your dentist if work shifts or another treatment make the instructions difficult to follow.
- Clean the guard as directed after removal. Rinse it and use the cleaning method recommended for its material. Avoid hot water, boiling, dishwashers, and unapproved chemical cleaners.
- Store it in its designated case. Follow drying instructions, keep it away from heat, and place it beyond the reach of pets and young children.
- Bring it to review appointments. The dentist can inspect fit, wear, and your teeth together. Report changes rather than waiting for the appliance to break.
Expected result: Your guard has a consistent cleaning and storage routine, and you know which changes need review.
For your 2026 follow-up notes, record whether the guard stays seated, where discomfort occurs, and whether your bite feels different after removal. A short written description helps you report the problem accurately. Do not keep wearing a painful appliance just to complete a self-imposed adjustment period.
Repeat the workflow after dental changes
A replacement guard is an adjacent workflow, not simply an automatic copy of the original. New restorations, tooth movement, damage, or a changed bite can make older records unsuitable.
- Bring the old guard to your examination. Its wear pattern and fit give the dentist useful information, even when it no longer works comfortably.
- Identify what changed. Mention crowns, fillings, extractions, orthodontic treatment, and any new jaw or sleep symptoms.
- Ask whether adjustment or replacement is appropriate. An intact guard sometimes needs professional adjustment; a distorted, damaged, or incompatible appliance needs a different plan.
- Repeat records when indicated. Do not assume a stored scan or old model still represents your mouth.
- Complete another delivery check. A replacement still needs assessment of seating, retention, and bite contacts.
Expected result: The revised appliance plan reflects your current teeth rather than an outdated mouth shape. Include pending dental work in your 2026 replacement plan before new records are finalized.
Troubleshooting
The impression triggers gagging
Tell the team immediately and use the agreed stop signal. Discuss positioning, breaks, and whether a different recording approach is appropriate before another attempt. Do not try to endure breathing difficulty to finish the record.
The finished guard will not seat fully
Stop forcing it and contact the dentist. Possible causes include an obstruction, changed tooth shape, or an appliance fit problem; the remedy depends on examination. Do not heat, trim, or bend the guard yourself.
One tooth hurts or an edge rubs
Arrange a fit review and identify the exact location. A pressure point and an unrelated tooth problem need different treatment. Increasing wear time is not a substitute for evaluating pain.
Your bite feels persistently different after removal
Stop using the guard and request an assessment. Describe how long the change lasts and whether it comes with pain or difficulty chewing. Do not attempt to correct the bite by grinding the appliance at home.
The guard cracks, loosens, or develops a rough surface
Stop using a broken or loose appliance and have it assessed. Keep the pieces if it breaks, and bring the guard to the appointment. Household glue is not an appropriate repair material for an appliance worn in your mouth.
Customize your workflow
Build your plan around the reason for treatment, not a preferred material selected online. If you wear a retainer or aligners, ask how tooth protection and orthodontic retention will be coordinated. A grinding guard is not automatically a retainer.
If snoring or breathing pauses are part of the picture, discuss a sleep evaluation rather than choosing a grinding guard as a substitute. Sleep apnea appliances have a different treatment purpose and require an appropriate clinical pathway.
For a family dental appointment in Lake Worth, contact Dental Arts of Atlantis and explain whether you need an initial assessment, a fit review, or advice after recent dental work. That distinction gives the dental team a clearer starting point.
FAQ
What happens during the custom night guard impression process?
The custom night guard impression process records your teeth and bite after a dental assessment. Those records support fabrication, followed by a delivery appointment to check seating, retention, and bite contacts.
Do I need a physical impression or a digital scan?
Your dentist selects a recording method that suits the case and fabrication workflow. Physical impressions use material in a tray; digital scans capture tooth surfaces with an intraoral scanner.
Does getting a night guard impression hurt?
An impression should not require you to tolerate sharp pain. Tray pressure or gagging can occur, so tell the team about discomfort and agree on a stop signal before recording begins.
How long does it take to receive a custom night guard?
Your dental office must confirm the delivery timeline for your appliance. Fabrication arrangements, record quality, and any treatment needed before fitting affect the schedule.
Should a new night guard feel tight?
A new night guard should stay seated without painful pressure or forced insertion. Contact your dentist if it pulls on a tooth, rocks, or will not reach its intended position.
Can I wear a night guard with a retainer or aligners?
Your dentist must coordinate a night guard with orthodontic appliances. Do not stack appliances or replace a prescribed retainer with a grinding guard on your own.
Will a custom night guard stop teeth grinding?
A custom night guard does not guarantee that teeth grinding stops. It provides a protective contact surface during wear, while the dentist evaluates symptoms and other treatment needs.
Can I reshape my night guard with hot water?
Do not reshape a custom night guard with hot water unless its prescribing dentist specifically directs that method. Heat can distort the appliance and change its fit or bite contacts.
One last thing
A guard can feel secure and still need a bite adjustment. Before leaving the delivery appointment, ask your dentist to distinguish retention from bite contact, then demonstrate removal yourself. That simple check closes the gap between receiving an appliance and knowing how to use it safely.
Related guides
- How long does it take to adjust to a night guard?
- Night guard materials for teeth grinding compared
- How sleep apnea oral appliance therapy works